import pandas as pd
import plotly.express as px

files = {"Dry": "assets/loadcell_dry_example.csv",
         "Oil": "assets/loadcell_oil_example.csv",
         "Grease": "assets/loadcell_grease_example.csv"}

df = pd.concat([pd.read_csv(f).assign(condition=c) for c, f in files.items()])
df["F_kN"] = df["N"] / 1000

fig = px.line(df, x="t_s", y="F_kN", color="condition", template="simple_white",
              labels={"t_s": "Time (s)", "F_kN": "Axial force (kN)"})
fig9.14 Lab instruction – Bolted joints
“Since the function of a joint is to transmit load from one element of a structure to its neighbour, stress has somehow got to get itself out of one piece of material and then get itself into the adjoining piece.”
— J. E. Gordon, Structures: Or Why Things Don’t Fall Down, 1978
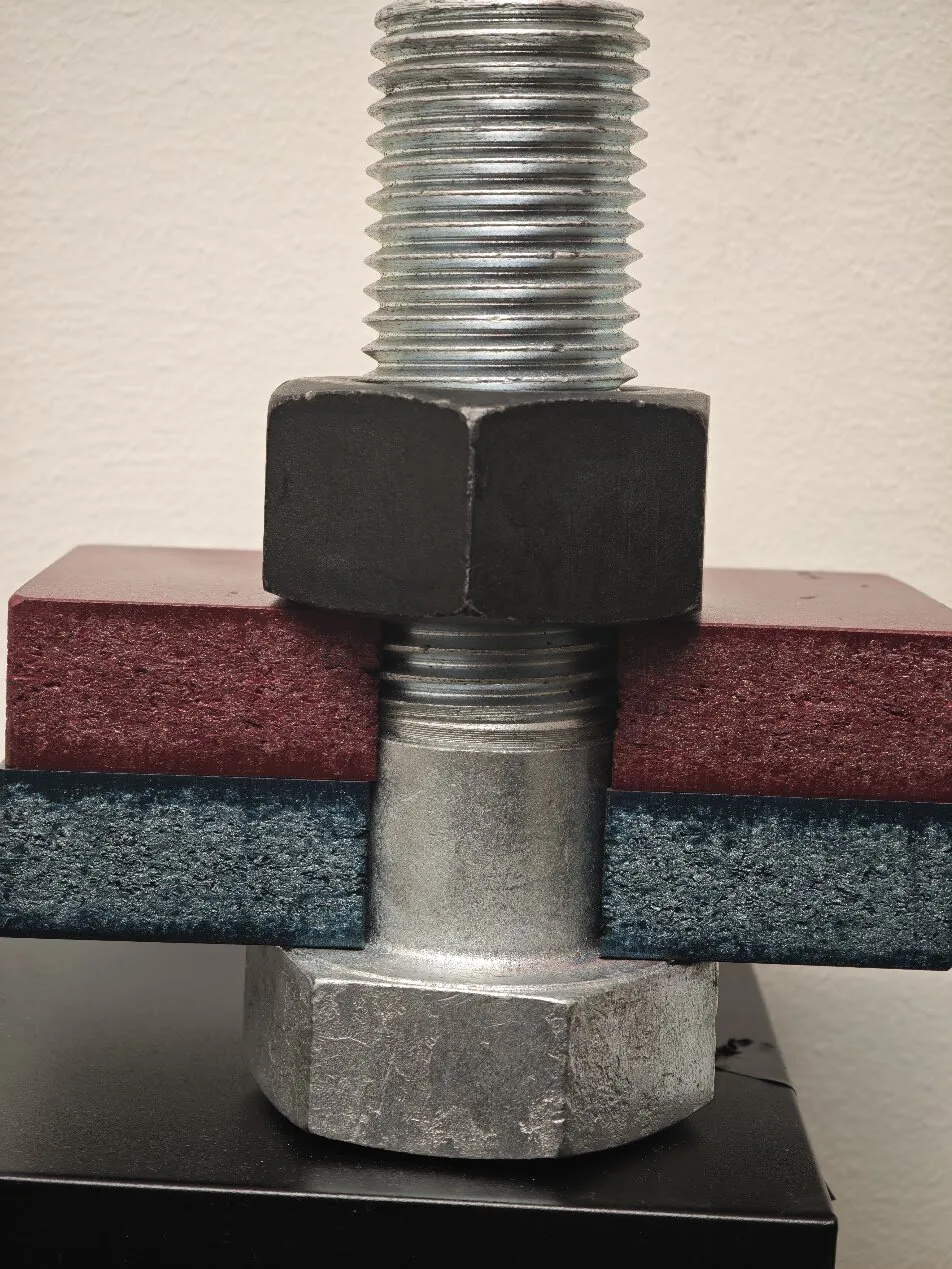
Tightened to the same torque, a greased screw clamps much harder than a dry one, because friction takes most of the torque (Example 1 of the bolted joints chapter, where a screw with a nut is called a bolt). We measure how much harder. We clamp a screw around a ring load cell, tighten and loosen it with a digital torque adapter, and record the axial force in the screw while we do so, for three lubrication conditions:
- Dry screw
- Screw lubricated with oil
- Screw lubricated with grease
The bolted joint configurator predicts the torque for a given preload, screw and lubrication. We use it to choose the tightening torque, and the chapter’s 9.13.5 to back out the friction coefficient from the measurements.
Equipment
- Load cell box with its USB cable, and the load cell stack of Figure 9.14.2
- A computer with Chrome or Edge
- Biltema digital torque adapter (art. 10-258), a ½” ratchet and a socket for the nut
- A vise
- M10 screws of class 8.8, nuts and washers: a new set for every lubrication condition
- Oil, grease and paper towels
Used screws, nuts and washers go in the Fe recycling bin in the metal workshop.
Assembly
Mount the screw through the load cell stack with a washer on both sides, as in Figure 9.14.2. The head of the screw is clamped in the vise, and the nut is tightened from above with the torque adapter, as in Figure 9.14.3.
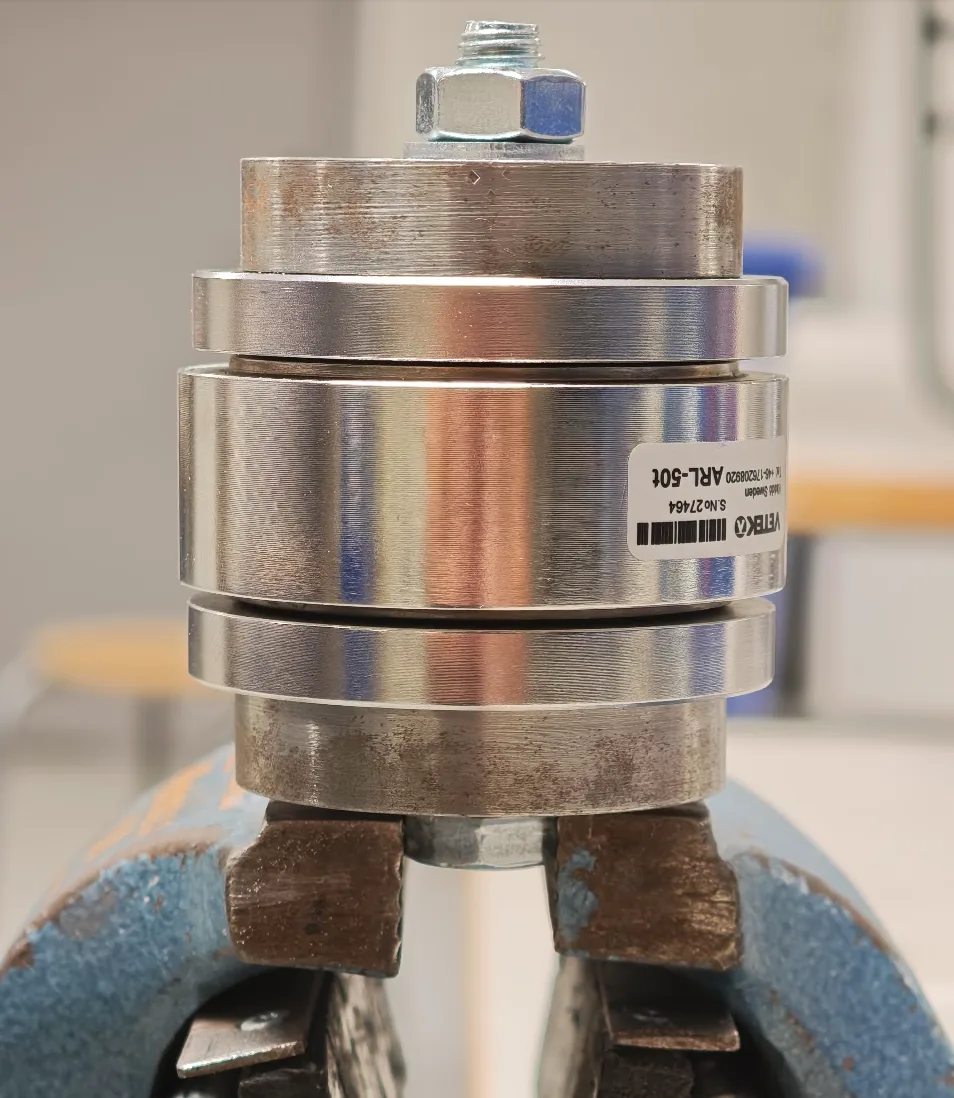
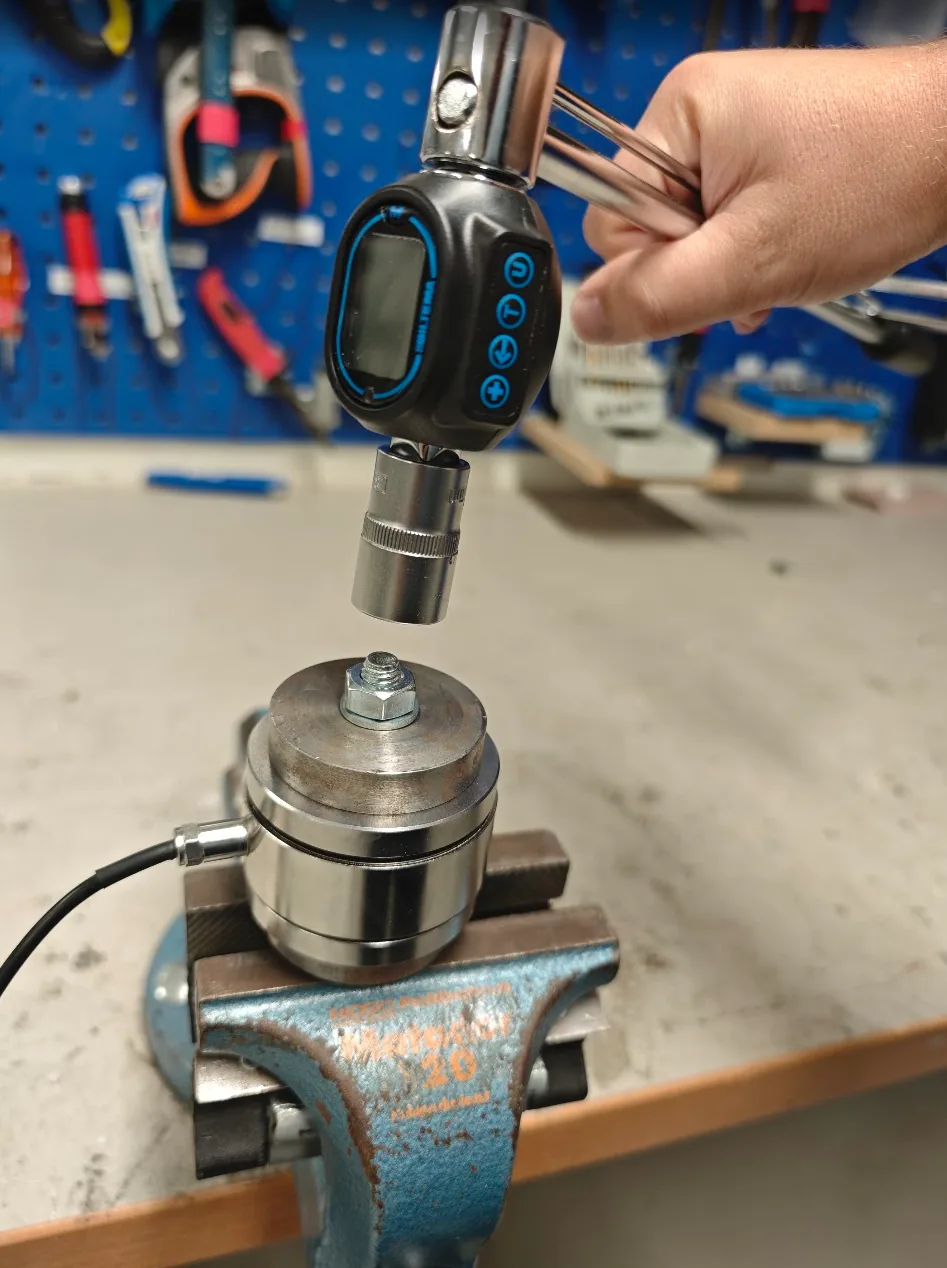
The torque adapter
The digital torque adapter sits between the ratchet and the socket and shows the torque in both directions, clockwise when tightening and counter-clockwise when loosening. Its range is 40 to 200 N·m with an accuracy of ±2 %; below 40 N·m the reading is outside the specified range.
NoteUsing the torque adapter (from the Biltema manual)
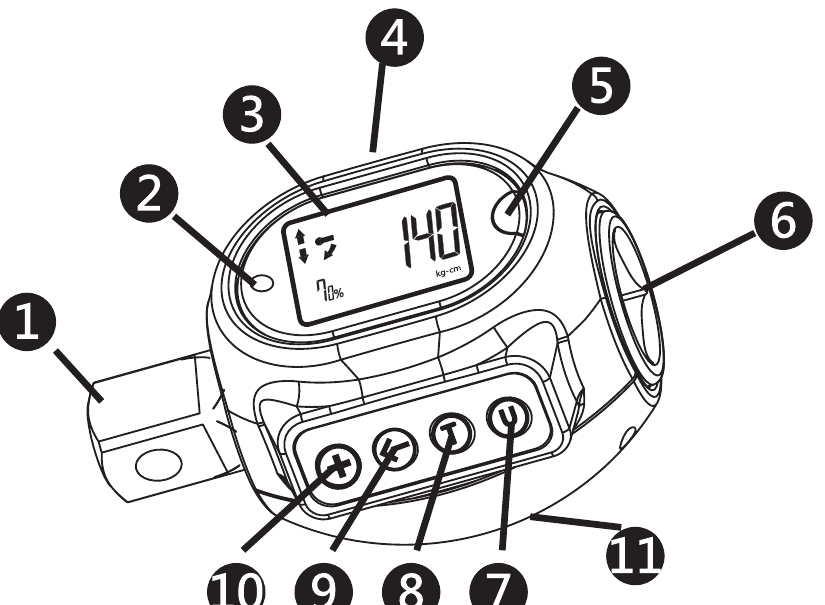
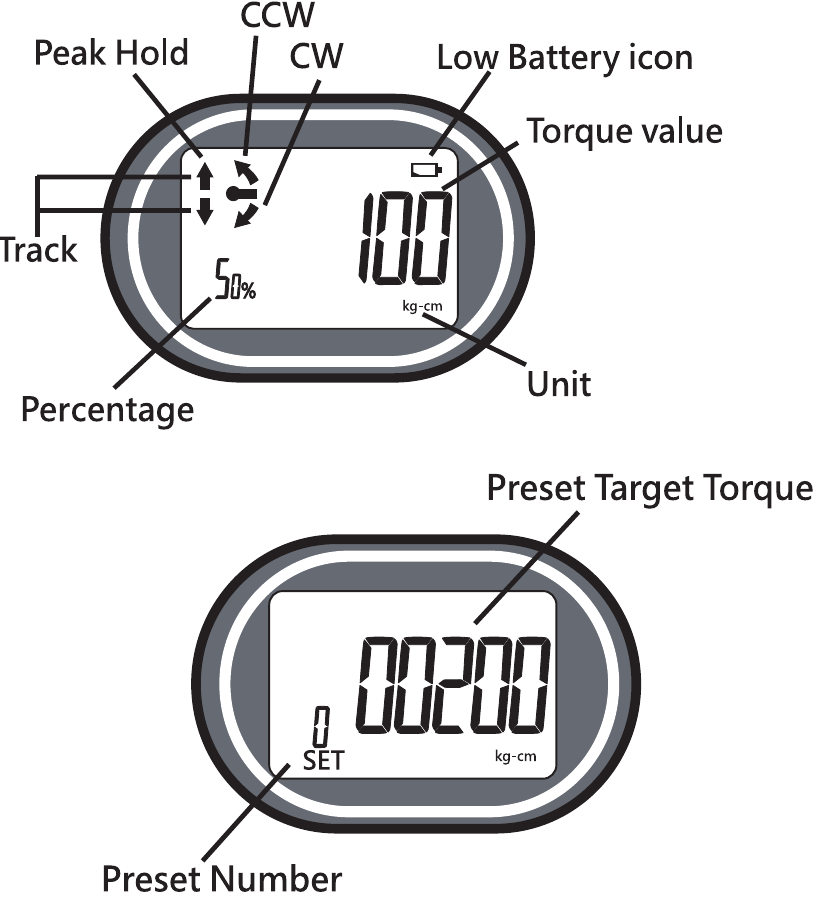
On and off. Press MODE (5) and wait until the display shows 0. Hold MODE for 2 s to switch off. The adapter switches itself off after 3 minutes without use.
Unit. Press U (7) until the display shows N-m.
Max or continuous reading. Hold T (8) for 2 s to switch the display between Peak Hold, which keeps the largest torque reached, and Track, which shows the torque continuously. Peak Hold is the one to use when noting the tightening and loosening torques.
Limit beep. The adapter beeps when the torque approaches a preset target torque.
- Press + (10) to choose a preset number from 0 to 10.
- Press the arrow (9) to move between the digits of the target torque, and + to raise the digit.
- Press U to choose the unit.
- Confirm with T.
A short press on T switches the alarm between Track, where the beeps start at 70 % of the target and come faster at 90 %, and Peak, which beeps only at 100 %. A continuous beep means the target torque is reached: stop turning.
The full manual is saved here: biltema_torque_adapter_manual.pdf.
Using the load cell
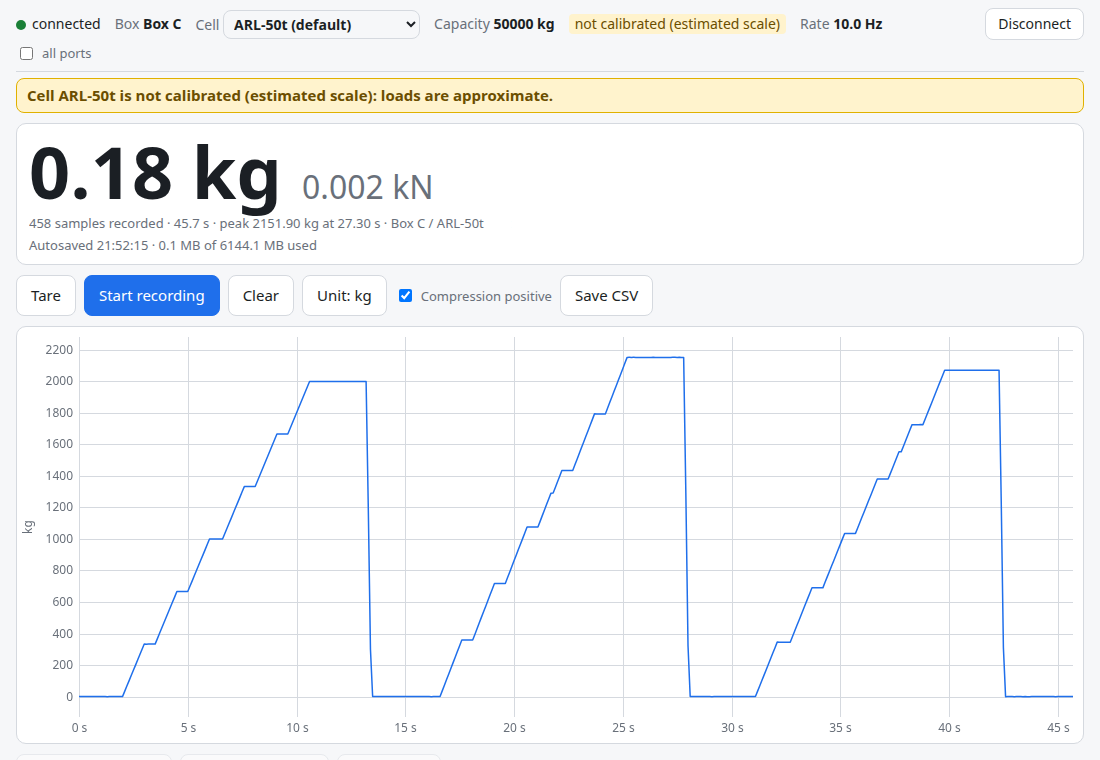
- Connect the load cell box to the computer with the USB cable.
- Open the load cell logger in Chrome or Edge and click Connect. The first time a computer sees the box, Windows installs its driver silently, and the box shows up in the list after a few seconds. If it is still missing, install the CH340 driver and plug the box in again.
- Tick Compression positive, since the screw compresses the load cell.
- Press Tare with the screw unloaded.
- Press Start recording, tighten and loosen the screw, then press Stop recording.
- To crop the recording, drag on the chart to select the part to keep and press Crop to selection.
- Press Save CSV, then Clear before the next series.
Workflow
Every series uses the same torque, so that the preloads can be compared at one torque. Before the lab, open the configurator, choose the size and property class of your screw, and find the tightening torque that brings the greased screw to about 70 % of its yield force. Grease gives the highest preload at a given torque, so the same torque keeps the oiled and the dry screw further below yield. Set this torque as the limit beep on the torque adapter and use it for every series. Never tighten past it.
NoteThe torque for the M10 screw
For the M10 screw of class 8.8, the lowest friction coefficient the configurator offers for an untreated screw, \(\mu = 0.10\), gives about 36 N·m (Problem 1 of the chapter). That is below the adapter’s range, so set the limit to 40 N·m, which takes a screw at \(\mu = 0.10\) to about 77 % of its yield force.
For each lubrication condition:
- Take a new screw, nut and two washers. Oil or grease the thread and the face of the nut; leave the dry set clean.
- Mount the screw finger-tight, as in Figure 9.14.2.
- Press Tare in the logger, then Start recording.
- Tighten until the torque adapter beeps continuously, and note the torque it shows.
- Loosen the nut and note the loosening torque.
- Repeat steps 4 and 5 three to five times, depending on the spread in the measured values.
- Press Stop recording, crop the recording and save it as
dry.csv,oil.csvorgrease.csv. Press Clear. - Throw the screw, nut and washers in the Fe recycling bin.
Analysis with Python
The files loadcell_dry_example.csv, loadcell_oil_example.csv and loadcell_grease_example.csv hold fictive recordings of the three conditions, each with three tightenings. Their columns are the time t_s in seconds, the raw reading raw, and the load in kg and N. We read all three into one table and plot them together:
Each peak is the preload reached at one noted torque. find_peaks finds the peaks, and we pair them with the torques noted from the adapter:
from scipy.signal import find_peaks

M_t = {"Dry": [40, 43, 41],      # tightening torques in N·m, in the order they were noted
       "Oil": [40, 43, 41],
       "Grease": [40, 43, 41]}

rows = []
for c, d in df.groupby("condition", sort=False):
    peaks, _ = find_peaks(d["F_kN"], prominence=2, distance=50)  # rise of 2 kN, 5 s apart
    rows += [{"condition": c, "M_t": m, "F_0": f} for m, f in zip(M_t[c], d["F_kN"].iloc[peaks])]
table = pd.DataFrame(rows)
table| condition | M_t | F_0 | |
|---|---|---|---|
| 0 | Dry | 40 | 19.603680 |
| 1 | Dry | 43 | 21.102963 |
| 2 | Dry | 41 | 20.303929 |
| 3 | Oil | 40 | 23.603731 |
| 4 | Oil | 43 | 25.202947 |
| 5 | Oil | 41 | 24.303980 |
| 6 | Grease | 40 | 25.403675 |
| 7 | Grease | 43 | 26.902958 |
| 8 | Grease | 41 | 26.003991 |
The preload against the torque shows the effect of the lubrication at a glance:
fig = px.scatter(table, x="M_t", y="F_0", color="condition", template="simple_white",
                 labels={"M_t": "Tightening torque (N·m)", "F_0": "Preload (kN)"})
fig
Each pair of torque and preload gives the friction coefficient through 9.13.5 of the chapter. We take the same coefficient in the thread and under the nut, \(\mu_g = \mu_u = \mu\), as the configurator does, and solve for \(\mu\) with brentq. The nut bears on a washer, so the bearing ring runs from the washer hole to the face of the nut:
import numpy as np
from scipy.optimize import brentq

d, P, d2 = 10, 1.5, 9.026        # M10 coarse thread: diameter, pitch, pitch diameter [mm]
d_w, d_h = 14.6, 10.5            # bearing face of the M10 nut, hole of the ISO 7089 washer [mm]
phi = np.arctan(P/(np.pi*d2))    # lead angle of the thread
r_m = (d_w + d_h)/4              # lever arm of the friction under the nut [mm]

def tightening_torque(mu, F_0):
    """Tightening torque in N·m for the preload F_0 in kN (kN·mm = N·m)."""
    rho = np.arctan(mu/np.cos(np.radians(30)))    # friction angle of the 60° thread
    return F_0*(d2/2*np.tan(phi + rho) + mu*r_m)

# the mu at which the model gives the noted torque for the measured preload
table["mu"] = [brentq(lambda mu: tightening_torque(mu, F) - M, 0.01, 0.5)
               for M, F in zip(table["M_t"], table["F_0"])]
table.groupby("condition", sort=False)["mu"].agg(["mean", "std"])| mean | std | |
|---|---|---|
| condition | ||
| Dry | 0.155290 | 0.000989 |
| Oil | 0.126258 | 0.000834 |
| Grease | 0.116523 | 0.001136 |
Questions
Answer with the help of your measurements and the configurator.
- How does the preload at the same torque differ between the lubrication conditions?
- Which friction coefficient does each condition give? Compare with the values the configurator uses and with the range of Figure 9.13.10 in the chapter.
- How does the loosening torque differ between the lubrication conditions, and how does it compare with the tightening torque?
- How does the spread in the measured values differ between the lubrication conditions?
- Set the configurator to your screw and lubrication, and set \(F_0\) to your measured preload. Which tightening torque does it predict, and how close is it to the torque you noted?
- Which loosening torque does the configurator predict? Compare with your measurement.
- How large an axial force can the screw take before it yields? Read \(F_\mathrm{st}\) from the configurator and compare it with your largest preload. How does it change for property class 10.9?
If time permits
- Clamp the load cell stack between the jaws of the vise, without a screw, and tighten the vise by hand while recording. How much force does a vise generate?
- Lubricate the vise screw and repeat. What happens, and why?